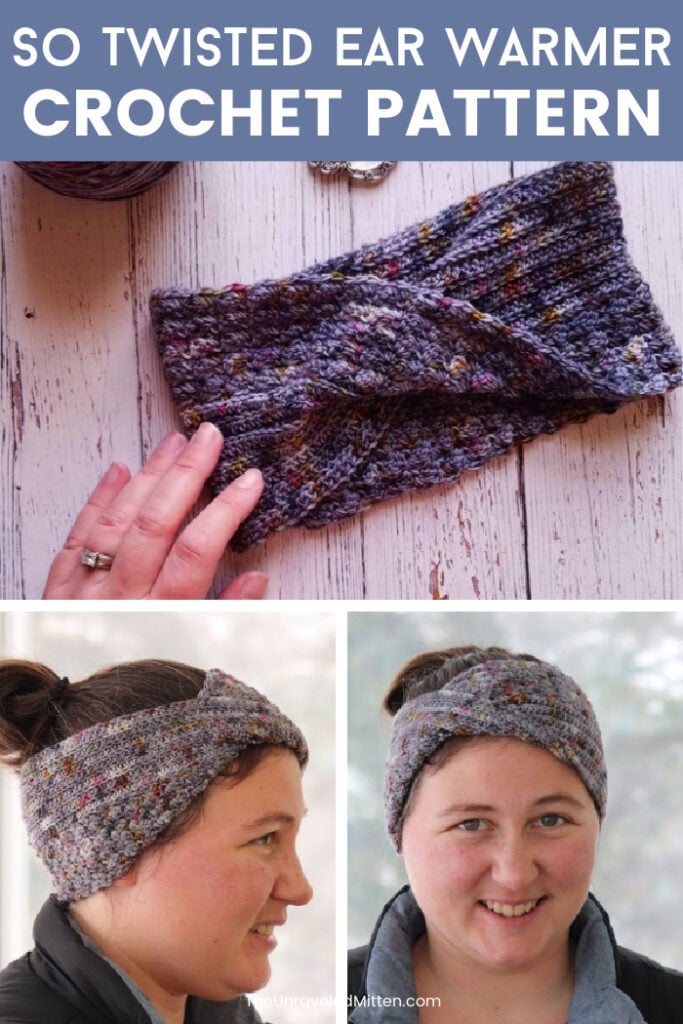
This easy ear warmer pattern uses a small amount of fingering-weight yarn and a couple of textured crochet stitches. This is a pattern you can make over and over again.
Although this ear warmer is lightweight, using 100% wool yarn adds some extra warmth.
This pattern uses 160 yards of hand-dyed yarn, but you can use any category #1 or fingering-weight yarn. I’ll add a couple of budget-friendly options, as well as the yarn I used in the materials and information part of the pattern, because I know not everyone has a $30 skein of yarn in their budget.
If you do have a few pretty skeins or partial skeins of sock yarn in your stash, this is a great pattern to use them up.
Looking for tips on working with hand-dyed yarn? Check out this post.
Materials and Pattern Information
- 160 yds 75% superwash Merino, 25% nylon | 4 ply fingering weight yarn | 460 yds/100g
- 3.5mm Crochet hook
- Scissors
- Tapestry Needle
Gauge: 12 BLO hdc x 12 rows = 2 in
Measurements: 19 in x 4.5 in before seaming
Abbreviations Used
- I use US terminology
- Fhdc: foundation half double crochet (SEE A TUTORIAL HERE)
- BLO: back loop only
- Hdc: half double crochet
- Ch(s): chain(s)
- St(s): stitch(es)
- Sc: single crochet
- Dc: double crochet
Notes
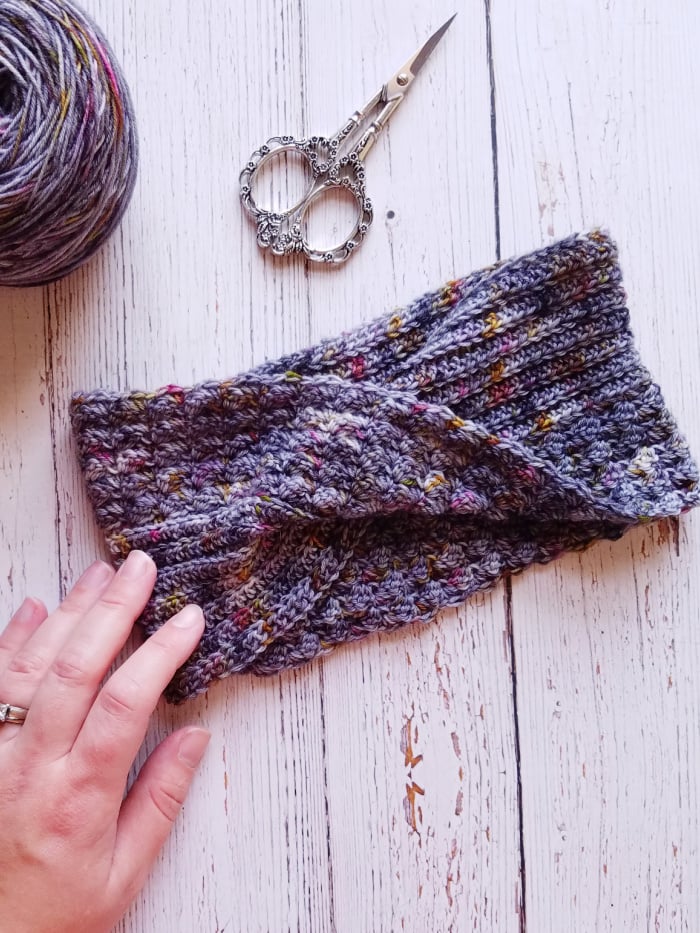
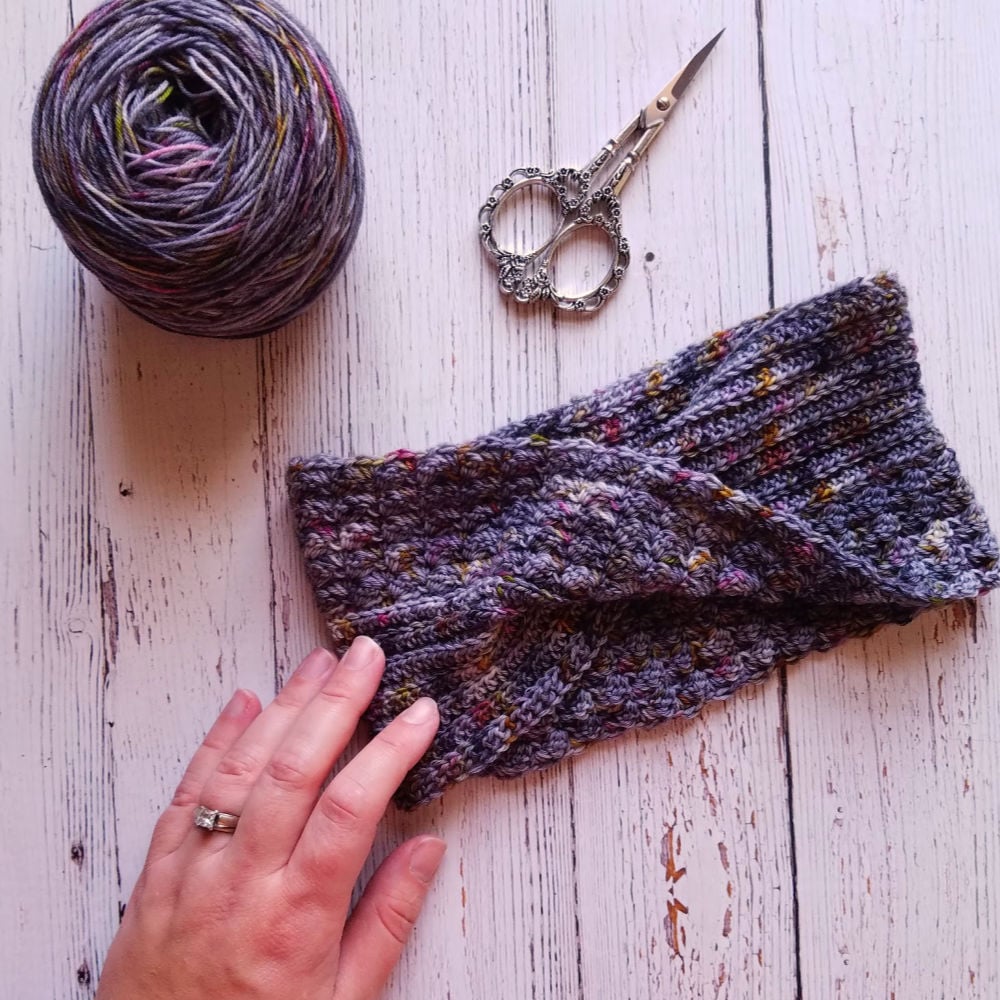
- This headband is worked flat in rows, twisted once and then seamed together.
- Should fit most teen/adult women. If you want to modify the size, you will need to use a multiple of 3 + 1 fhdc sts or a multiple of 3 + 2 if using traditional starting chains
- Ch 1 does not count as a stitch
- I highly recommend using the foundation half double crochet called for in the pattern, this creates a nice stretchy edge.
So Twisted Ear Warmer Crochet Pattern
Row 1: Fhdc 109. Turn. Alternatively, you may Ch 110, hdc in 2nd ch from hook and in each ch across. Turn (109)
Row 2-14: Ch 1, working in BLO, hdc in same st as ch 1 and in each st across. Turn (109)
Row 15-24. Ch 1, (sc, 2 dc) in same st as ch 1, *skip 2 sts, (sc, 2 dc) in next repeat from * across. Skip 2 sts, sc in last. Turn. (109)
On last row, finish off and leave long tail for seaming.
Finishing
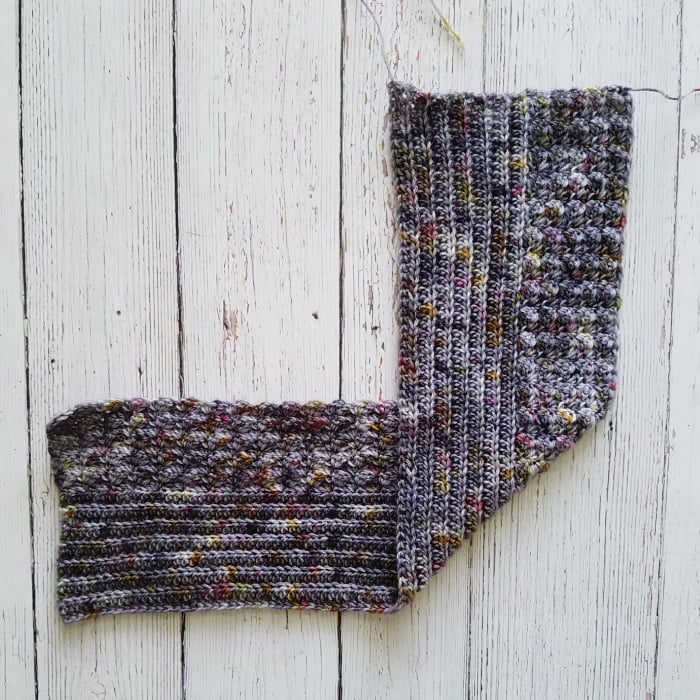
Lay flat, fold one end up to make an ‘L’ shape.
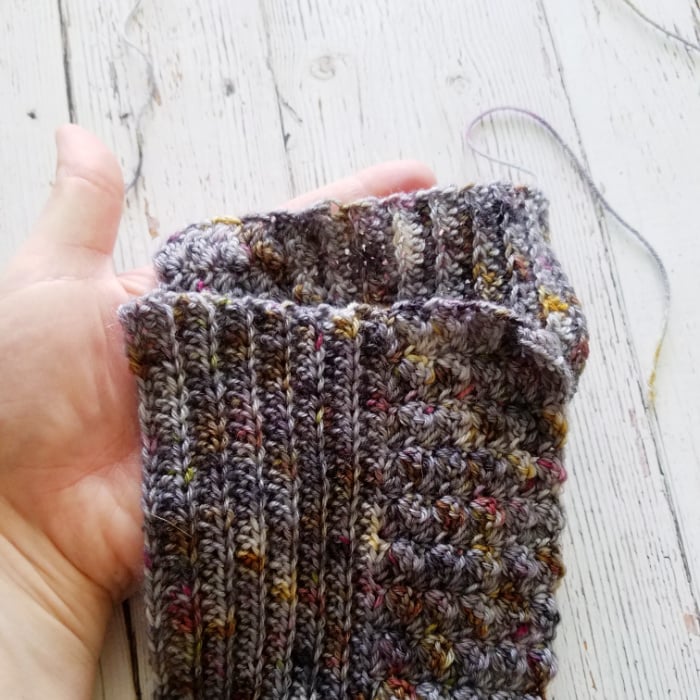
Bring the short ends together so the stitch patterns are opposite. Whip stitch seam together with tapestry needle. Weave in ends.
I am absolutely loving your page. You have so many ideas and resources and I’m learning from you as I begin to crochet. Thank you!!