This was my very first pattern I added to my blog almost a year ago! I designed this beanie right around Christmas time last year, so I thought it was fitting to give it an update. Reading back on this post has reminded me how far I’ve come in the past year and all that I have learned.
The very first version of this hat I made for my hubby used a bulky weight yarn. I was immediately in love with the stretchiness of it and new I had to replicate in worsted weight… so with Christmas so close it was the perfect excuse to make one, actually in total I made four lol.
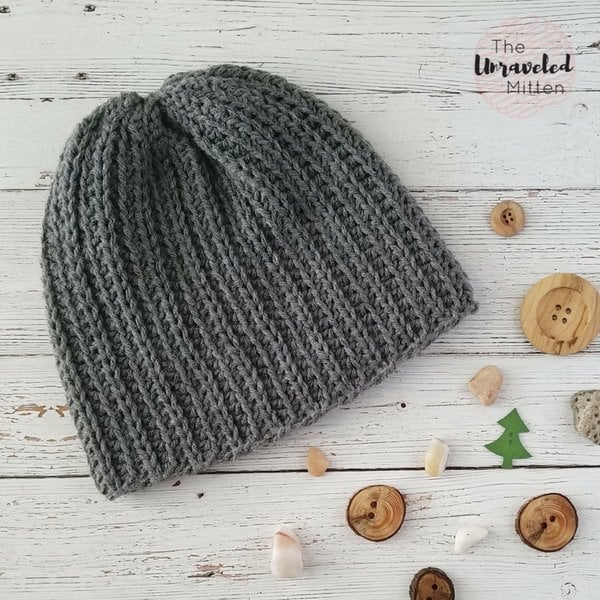
This hat is worked flat using a combo of front and back loop half double crochets. I added some slip stitches at the top so after you seam it together and cinch it closed it has a little shaping and isn’t so bunchy.
Even though I designed this hat for my hubby, I think it would work just as well for the ladies too! You could even make it slouchy by adding more chains to your foundation chain.
I live in Michigan and it is cold cold cold here in the winter so you need a hat that is tightly woven to keep out those blustery winds. This hat is nice and toasty, it is husband approved lol. I named it after the coldest Great Lake, Lake Superior. Its even cold in the summer.

You may purchase and Ad-Free PDF version of this pattern on Ravelry.
Materials
- Less than a ½ skein of Bernat Super Value Yarn (7 oz/426 yds per skein) or similar #4/Worsted weight yarn
- 5.5 mm/I Hook
- Tapestry needle
- Scissors
Size and GAUGE
- Gauge: 7 stitches x 5 rows in pattern = approx. 2 in. square
- Finished hat measures 9 in wide in x 8 in tall layed flat
Abbreviations
- I use US Terminology
- Hdc: half double crochet
- Ch(s): chain(s)
- Sc: single crochet
- Sl st: slip stitch
- FLO: front loop only
- BLO: back loop only
- St(s): stitch(es)
Notes
-Ch 1 does not count as a stitch
-If you want to make a slouchy version add more chains to your foundation chain
Add this to your favorites on Ravelry HERE.
Pattern
Row 1: Ch 31, hdc in 2nd ch from hook and accross until 5 ch remain. Sc in next and sl st in last 4. Turn. (30)
Row 2: Ch 1, Working in FLO sl st in same st as ch 1 and in next 3, sc in next, Then hdc accross. Turn. (30)
Row 3: Ch 1, Working in BLO hdc in same st as ch 1 and in each st across until 5 sts remain. Sc in next st. Sl st in last 4. Turn. (30)
Row 4-42: Repeat rows 2 and 3. You will end on a “row 2” break yarn leaving a long tail for sewing. (30)
Fold piece so the right sides are together. Whip stitch edges together through the front loop of the edge in front and back loop of edge in back. You can find a tutorial here. After you seam up the edges weave the yarn back and forth through stitches around top of hat. Pull tight to cinch the opening closed. Place a couple stitches in top of hat. Weave in ends.
If you liked this hat you might want to check out these other hat patterns: here, here and here.
Come join the fun and follow me on Facebook and Instagram! Don’t forget to tag me in your pictures, I love to see what you made!
PIN ME!

I’m lazy so rather than find a needle and sew the seam I just slip stitch it together
Good morning 🙂
Thanks for your lovely pattern – enjoying it greatly!
Quick question: what’s your trick to keep edges nice, neat and straight? Mine are always very knotty and definitely not looking neat.
Thank you!!
use stitch markers at the beginning and end of each row
Hi! I’m sort of a beginner 😬 how many more stitches do you add for a slouchy beanie for a man? Thank you!
I would love to know this too? 🙂
I am an experienced crocheter, but it just seems like there are there loops here depending on how you roll the piece, and sometimes I get confused as to back or front loop.
Thank you very much, this is just what I needed because for some reason I’m having difficulty connecting the chain without it being twisted. I’m going to get my yarn and start making it tonight. Thanks again!
I decided to make it at least 22 inches; I like the look of the ribbing as is, without it being stretched. Thank you so much for this pattern.
You’re very welcome!
Heather,
I had to use a g hook to meet the gauge. Will this hat stretch enough to fit a 23-24 inch circumference?
I am not positive but with this pattern you can add or take away as many rows as you need. Crochet until you have a 22-23 inch length.
Thank you! This was so easy and fast to make.
When you measure someone’s Head do you add or take away any stitches bc of stretch?
I’m assuming the end with the ss and sc is the band??? Thank you so much!! I think this is a perfect beanie!
I’m so glad you like it!! The ss/sc end is actually the top.
Thank you so much!!
Hi. Is the entire 2nd row worked in FLO or just the first 4 stitches Thankyou for the pattern:)
You’re welcome! The entire row. 😊
Thank you for such a quick reply!
could you do a video tutorial of this hat? i cant read patterns
I love your patterns, thank you! And your name, the unraveled mitten ♡♡
And being a native to Michigan, I’m smiling over your beanie names!
The mighty Mac is indeed wonderful and a TRIP to travel over in the winter for sure. (Google it and see what I mean) 🙂
I’ve been looking for some cute and stylish hat patterns for my man so I really appreciate your sharing. Following your emails starting NOW!
I’d rather create a beanie today than paint my interior doors, thats for sure.
Keep on hooking, girl!
Sincerely,
Kara
Hi I love the look of this hat. What were the number of chains you used when you made the chunky version?
Thanks Deidre! I don’t remember off hand, but I believe it was in the neighborhood of 25 with a 6.5mm hook. You may just have to make a chain and measure it to get the height and it seams all #5 bulky yarns are a little different in thickness so that could effect your chain number. I used Lion Brand Wool-Ease Chunky.
Thanks!
Whoa! I love this! Very nice site, too! Welcome to WWO! 😀
Thank you!! It is one if my favorite hats. ??